My holiday gifts are wrapped down to the last stocking stuffer. What day is it? Oh, it is Nov.27th. Think how much time I have now to do other things besides finishing earning my $$ to pay for them. This was a cash only Christmas. Lots of fun and much more enjoyable than having to worry about paying it off. I recommend it highly!!
My Christmas job is at a local shop called Silver Impressions. They sell lots of jewelry and gift type items. The people there are super nice, and I have really been having a good time. I heard a rumor we get to buy one item at 50% off. Our normal discount is 25%. They want us to get something we really want for cost. Now, do I buy a gift, the sensible thing to do or do I buy that silver amethyst bracelet I really want. It's a tough call.
Oh, before I go...one last thing to make everyone sick: the house is decorated, too.
Sunday, November 27, 2005
Thursday, November 24, 2005
The Thanksgiving Apron
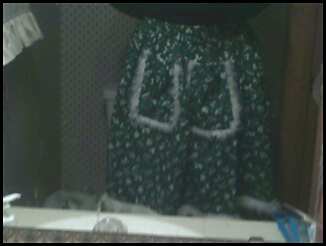
I bought some fabric last month to make Caitee and I matching aprons since we cook together on Thanksgiving. I made mine, but she wanted to make hers. Since she hadn't sewn before, I figured why not? She will enjoy it even more if she makes it herself. She didn't quite get it done in time for Thanksgiving. We had a few issues with needles breaking on the machine, and also, since she hadn't sewn before, she was a little slower than I was. Her apron is really turning out great. I'm sure when it is done, she will be very pleased with it! She got a little frustrated last night, but you know...Mommy Fix...and she was fine!
Here is a pic of my apron. It has penguins all over it. Caitee's favorite! I paid a little extra to get that fancy trim because it reminded me of snow. Since the penguins are playing in the snow, I thought it was fun.
I had to take this picture in the bathroom mirror in order to get myself since I was using my camera phone. The quality of the pic isn't that great, but you get the idea!
Wednesday, November 16, 2005
My Holiday Ornament
Okay, I know it isn't the greatest picture in the world, but you get the idea. Basic Gray Blitzen paper. This is my favorite pattern. I guess cuz it is FUN> You can't really see thw wire strung from the bottom or the word disc with JOY on it, but it is there if you really strain hard to look. All the edges of the ornament were covered in the krylon silver pen. I have got to make some more. Easy project. Big impact!
Tuesday, November 15, 2005
Holiday Gifts
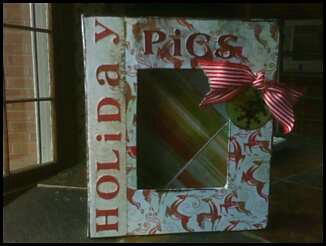
Okay. I have two of these things made, which I have talked about in my previous post. I just had to put my pictures up. I had to take the photos with my cell phone because none of the other stuff I have is working right now. Oh technology! Ain't it great! Clear transparency goes across the space on the cover. This is sized to hold 4x6 photos. I really like this BG Blitzen paper and how this project turned out. I especially like how I used a different patterned paper for the spine to add some interest. I forgot to add ribbon, but I don't think this will need it as I kind of expect it to lie flat and be displayed. Maybe I think too much of my art!
Sunday, November 06, 2005

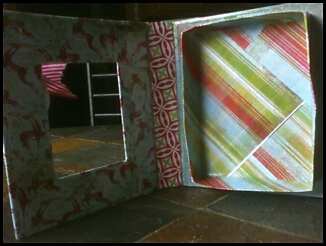
This fabulous box was made by my friend, Jen Caputo, who has a fabulous website for all you stamping and scrapping enthusiasts. She made her box to fit A2 sized cards. I made one myself that will hold 4x6 photos. This is such a terrific craft and originated with Trish at ClubScrap. They always have such great ideas.
I would post mine, but my scanner isn't working and my PDA won't interface with my computer right now. I just don't have the time lately to fool with it and get it all working. Maybe later this week. I highly recommend making this terrific project. The box bottom is made out of a 12x12 piece of paper with 1" edges all the way around. The cover, spine and bottom are made from chipboard/mat board. I just think this is one way to get your non-scrapping friends to store their photos in a clever way! My box I made says Holiday pics and I made it with the Blitzen papers from BG. Next am making another one with SEI paper. I've already got it all cut out and ready to glue while I watch my shows on tv tonight.
Friday, November 04, 2005
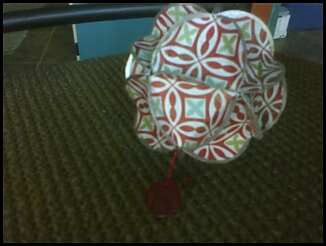
The Greatest Christmas Ornament
You may wonder where I have been lately. I've been swamped because I took a little 15 hour a week Christmas job, and that means I don't have a spare minute! The job is great and I've already bought and wrapped three Christmas gifts. As I like to say, 3 down and wrapped!
The fabulous ornament I am talking about can be used on your own tree, to give as gifts, or to decorate your home, and even be sold at a craft show. It is simply 20 circles, folding and glueing. I mean, that is about as easy as it gets. Lucky for you, I have made this fabulous thing and so I have worked all the kinks out of the project for you.
http://www.marthastewart.com/page.jhtml?type=content&id=channel1082&catid=cat405&navLevel=4 This website has a photo of the finished item and the directions for making this terrific project. I believe Carol Duvall made some on HGTV, too.
I recommend using a circle punch because your circles will be uniform. I used the gigantic one, the Giga one, I believe it is called. Take your punch and make 20 circles. Set them aside.
Punch one extra circle. This will be used as your equilateral triangle pattern. www.math.okstate.edu/~rpsc/Fall1999/Dana2.html This site gives you easy directions and visual aids about how to fold your circle to get your triangle pattern.
I took my circle pattern and folded into the equilateral triangle. I then took one of the 20 circles I had set aside and the triangle pattern inside the circle. I then folded two sides of the circle over the triangle. After that I took the triangle out and folded the bottom or third side out of the remaining paper. This will give you three flaps on each circle.
When you do the top and bottom of the ornament, all the triangles are glued so that their tips meet, which makes a circle, duh. But, the key to the 10 center pieces is the triangles are placed up/down/up/down so that a straight line is formed.
Be sure to use a very high tack glue as you do not want to get frustrated with pieces coming unglued as you are trying to put this thing together. Some of your tab sides may not match exactly. You can go over them with paint, an ink pad, or a krylon pen as an added decoration, and it will hide any of the white that may be showing.
I hope you enjoy this project as much as I did. I think once you do the first one, every one after that is a no brainer and you could make this watching tv!
Subscribe to:
Posts (Atom)